The Daily Decaf

taking a break from the buzz

Tag: Backpacking

10-Days in Morocco; Travel Itinerary

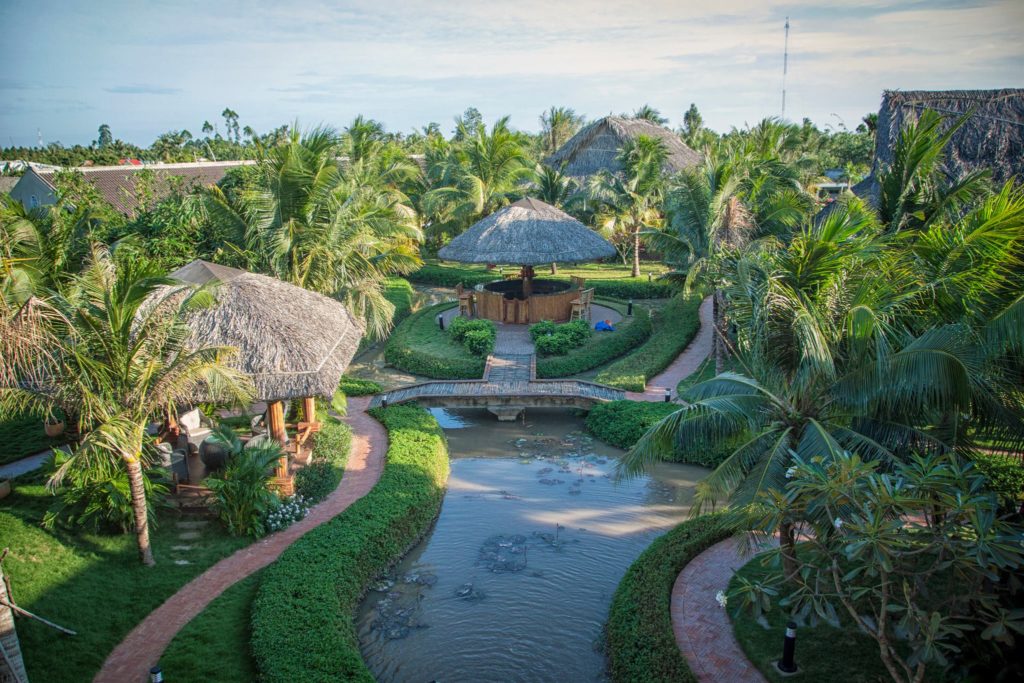
From bustling markets of Marrakech and Fez, the peaceful blue city of Chefchaouen, to the costal town of Essaouira, there’s plenty to see during a 10 day backpacking trip across Morocco.

Dried Fruit and Nut Souk; Marrakech, Morocco

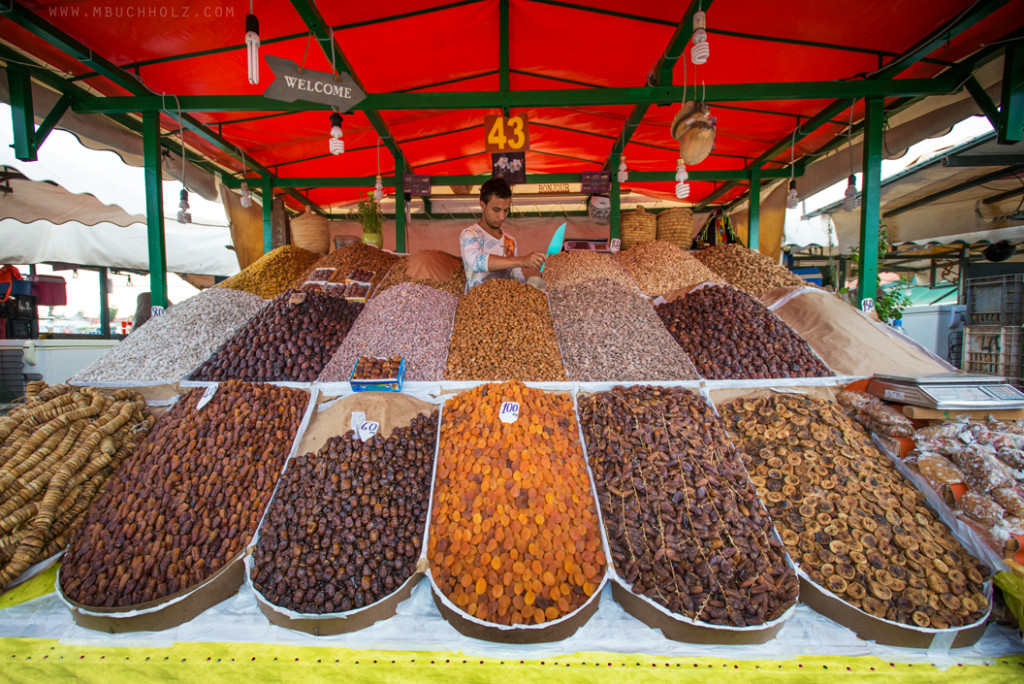
A vendor packages dried fruits and nuts at a local souk in Marrakech

What to expect from this itinerary: You’ll spend a few days on a crash-course-welcome to Morocco by visiting the busy streets and aggressive street vendors of Marrakech.  After a quick trip to the western shore, you’ll head out on a multi-day backpacking trek across the Sahara Desert on camelback to get you to the old medieval capital of Fez (Fes). From there you’ll visit the beautiful blue town of Chefchaouen before heading home (or to your next destination).

What You Need To Know

Currency: 1 USD = 10 MAD

Accommodation: 70-100 MAD for dorms and 120-350 MAD for privates in major cities. Prices range quite a bit depending on what city or town you’re in.

Food: 35 MAD tangine (a local staple made up of meat, veggies, and rice). Sit-down restaurants will charge 100 MAD for a meal.

Transportation: You have several options to get you around the country: buses (CTM), trains (ONCF), or “Grand Taxis” (where you pay by the seat) can get you around easily.

Etiquette: Tipping is common (and often required for public bathrooms), so carry small change; 5 MAD is usually acceptable in most situations. Dress conservatively: women should keep their legs, arms, and shoulders covered. If offered mint tea, be polite and accept the offer of hospitality.

What to do: Haggle hard in the local markets, visit the local hammam (bathhouse) for a spa treatment, travel the desert between towns via camelback.  See the Jemaa el-Fna of Marrakesh, camp in the Sahara, see the blue city of Chefchaouen, hike the High Atlas Mountains, surf in Taghazoute, and explore local history everywhere you go.

When to visit: Late March through May, or early fall.

Days 1 thru 2: Marrakech

Feel the bustle of one of the country’s best markets as you explore western Morocco. Upon arrival—and really for the duration of your stay—expect to get completely lost time and time again. Streets are not well labeled, you won’t see signs pointing you the right way, and the alleyways twist and turn, getting you utterly turned around. As a result, you’ll find many eager locals willing to offer you their service to guide you for a small fee. Be aware some of these are faux guides who will lead you to businesses that have already paid them off.


Markets of Morocco at Sunset

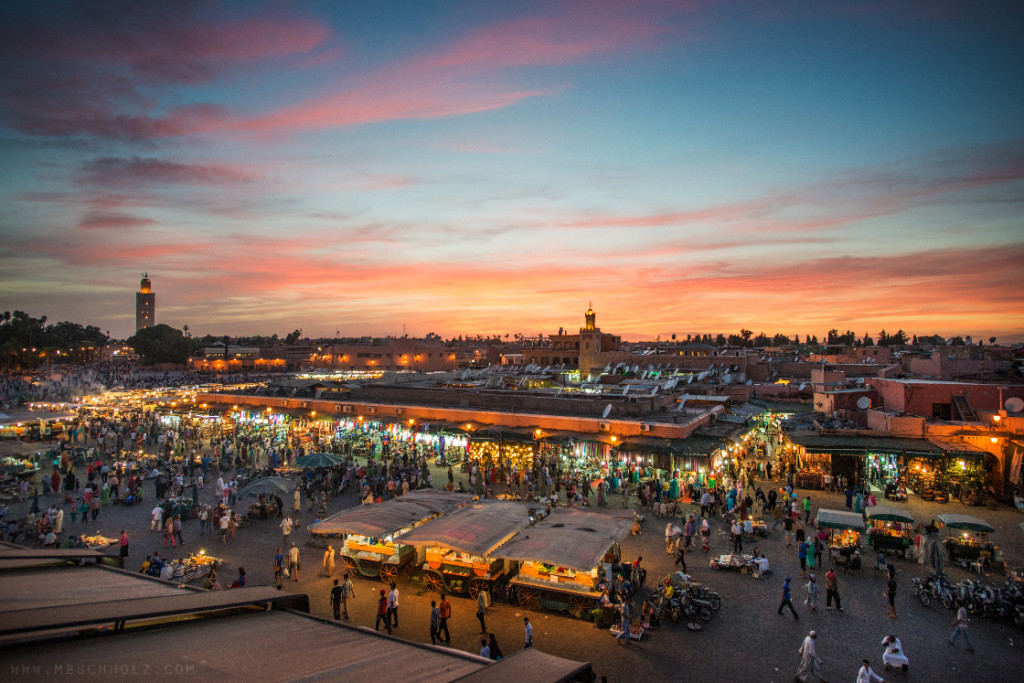
Jemaa el-Fnaa, Marrakech

  • Getting there: Fly into Marrakech airport and grab a taxi to the medina. If traveling by train to the area, hitch a taxi from the station to the square.
  • Where to stayRiad Argan. Email the hotel in advance to notify you of arrival and they can make arrangements to have you picked-up from the airport and escorted to the riad.
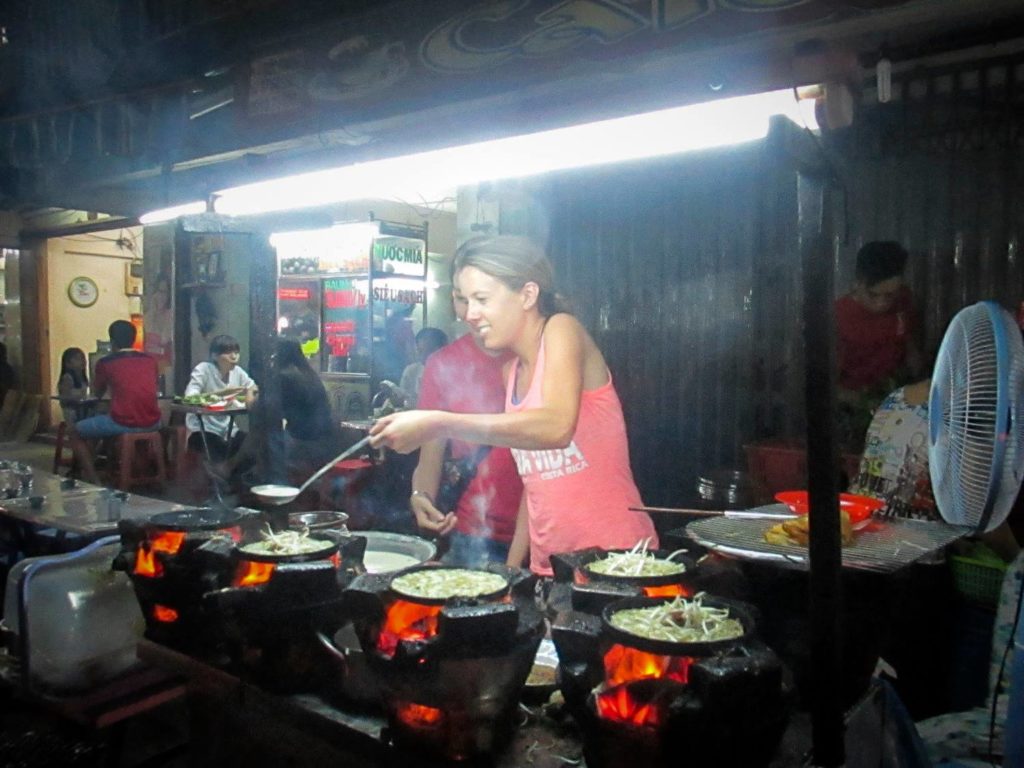
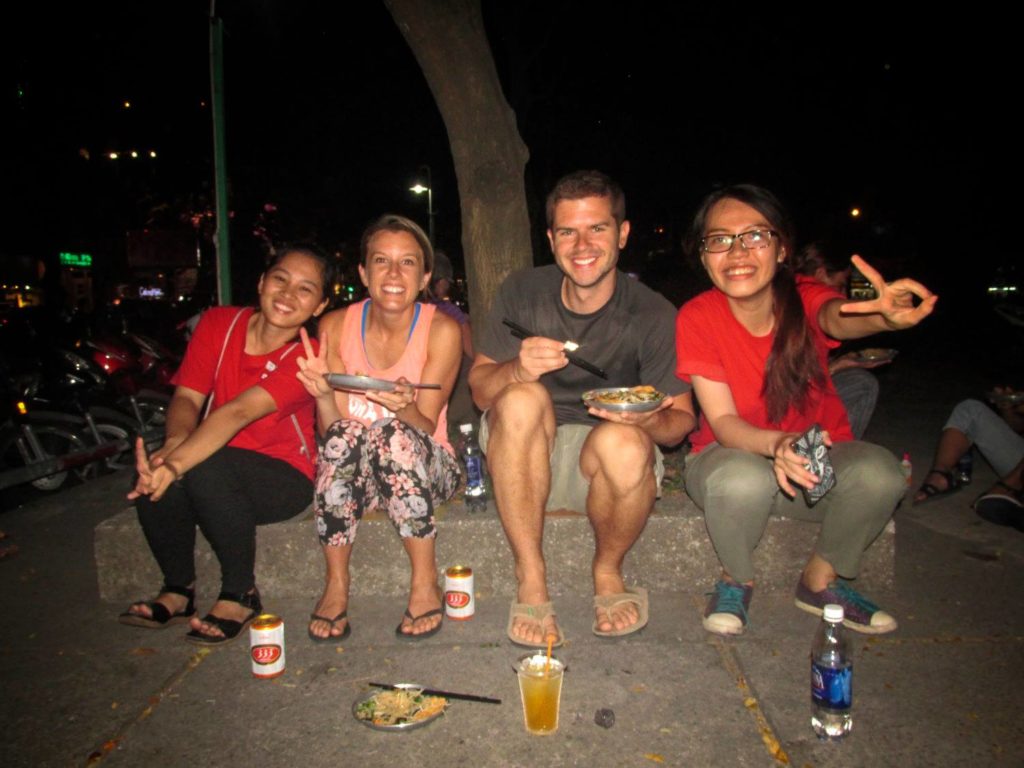
  • Where to eat/drink: Hands-down the best place to eat is in the food stalls that will fill the Jemaa el-Fnaa at sundown. There will be more food stalls than you can try in your trip, and for the most part, you can do no wrong. During the day, check Cafe Arrabe.
  • What to do: Walk through the Jemaa el-Fnaa and local markets in the Medina . Enjoy street food and take a day trip to the High Atlas Mountains. Take a local cooking class. If you have time, take a multi-day Sahara tour (min: 3 days / 2 nights) and travel via camelback to Fez, staying in local villages along the route.
  • What to do: Explore the city streets and take plenty of pictures, travel to the well-known nearby waterfall, climb the mountains.
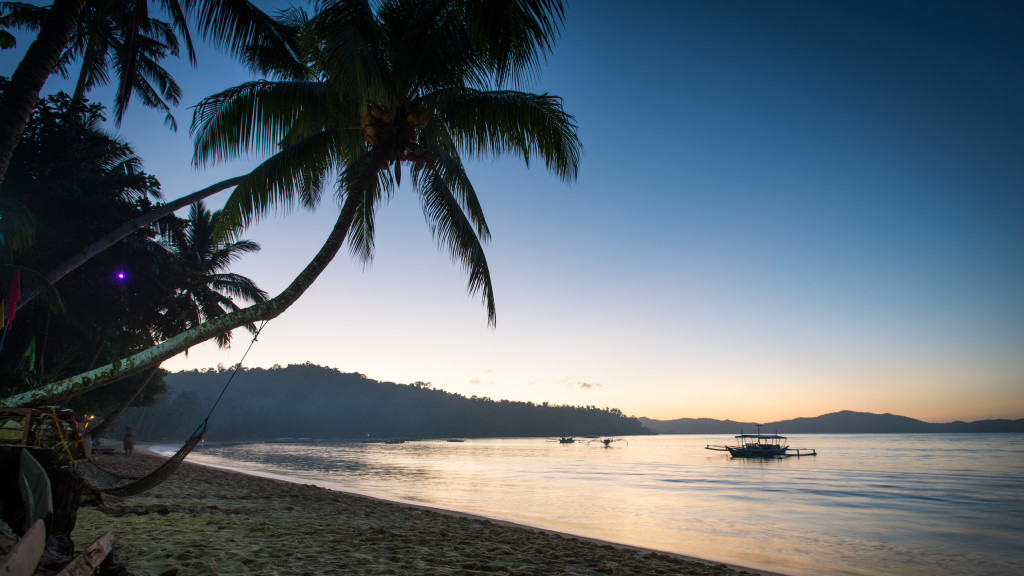
Day 3: Essaouira

Spend a day on the Moroccan coast in the small town of Essaouira and watch the sunset over the sea. Fans of “Game of Thrones” might also recognize the town from the TV series.

  • Getting there: Have your hotel book transport for you the day before, and either take a 3hr bus-ride (CTM) from Marrakech for 75 MAD or grab a grand taxi for 100-150 MAD/per person. From the bus station, grab a 15 MAD taxi into the medina.
  • Where to stay: Riad Malaika for 700 MAD or Riad Al Zahia for 500 MAD.
  • Where to eat/drink: As anywhere in Morocco, stick to the street stalls and try the soups,, sardines, tanjines, and fish.
  • What to do: Explore the town and hear some local music. Skip tanning and swimming in the strong winds and instead go kitesurfing.

Days 4 thru 6: Sahara Tour

It’s time to begin the trek to Fez, but rather than hop a bus, we’ll head to the desert and spend three days traveling by camel, giving you the opportunity to really get to know the landscape.  Along the way you’ll stop at local villages, head over the beautiful Atlas Mountains, have plenty of amazing picture opportunities, and spend each night camping in the desert.  You’ll be sore by the end of it, but it’ll be an experience you won’t soon forget.

  • Getting there: Take the 3hr bus-ride back to Marrakech for 75 MAD or grab a shared Grand Taxi for roughly 150 MAD/per. Ask your hotel to book the ride for you and have them book the multi-day Sahara tour for you as well. You have a couple options on the length of trip, but we allocated here for the minimum (3 days/ 2 nights)
  • Where to stay: Expect to camp each night in the desert. It will get very cool at night, so dress appropriately and have something warm for your feet.
  • Where to eat/drink: Your guides will take care of food and water for you on your stay, so there’s nothing to worry about.
  • What to do: Explore villages, take pictures, get to know your other travelers, and reflect.

Days 7: Fez

Explore the medieval capital of Morocco and one of the most well-preserved cities in the Arab world. Walk through the car-free Fes el-Bali and dodge mules and handcarts along the way.  While it’s an amazing city to explore, Fez (or Fes) will feel a bit reminiscent of Marrakech, so with limited time, just spend a night here before moving on to your next stop.

  • Getting there: If you followed our itinerary, you would have arrived by camelback, but in the event you strayed, you have a few options to get to Fez. Trains run multiple times a day from Marrakech and take about 7 hours for 200-300 MAD. Alternatively, you can hop a shared grand taxi for approx. 150 MAD/seat or grab a CTM bus for a 5hr drive.
  • Where to stay: Ryad Alya for 600 MAD.
  • Where to eat/drink: Explore the streets and eat at the local street stalls.
  • What to do: Get lost in the medina, see the 14th century college Bou Inania madersa, visit the Merenid Tombs, visit the tanneries.

Day 8 thru 9: Chefchaouen

Travel to the northeastern side of Morocco to the beautiful mountain town of Chefchaouen and explore the gorgeous blue streets of the medina with a view of the Rif Mountains in the distance. Be aware that drugs (particularly marijuana) are popular in this town, and you’ll likely get approach quite often on your trip by sellers.

  • Getting there: Catch the CTM bus (80 MAD) or grab a shared Grand Taxi. Plan for a 4hr travel time. From the bus station (gare routiere) grab a 10 MAD ride in a petit taxi to the medina.
  • Where to stay: Hotel Alkhalifa for 500 MAD if you’re up for stay a short walk from the city on a beautiful hillside, or Riad Assilah Chefchaouen for 600 MAD right in town.
  • Where to eat/drink: Get seafood tagine at Granada or Chez Faud, pastries at Pastry Ladies, or shop at one of the many food vendors you’ll see along the streets.
  • What to do: Explore the city streets and take plenty of pictures, travel to the popular waterfall on the east (Ras el Maa), explore the ruins of the Jemaa Bouzafar, and hike through the Rif Mountains or up the Jebel al-Kalaa.

Day 10: Getting Home

While most people you talk to will not recommend Tangier as a travel destination (it’s town now overwhelmed with tourists, businesses, and feeling wholly unauthentic), it’s the closest place to fly-out of (unless you want to bus back to Marrakech), so plan for just a quick trip to catch your flight out.

  • Getting there: Catch one of the multiple daily buses for 30-50 MAD to Tangier, 3hrs away, or grab a Grand Taxi for 100 MAD/per.

Anything we forget? Ideas of other places to check-out? Things not to miss? Leave it in the comments!

Tips

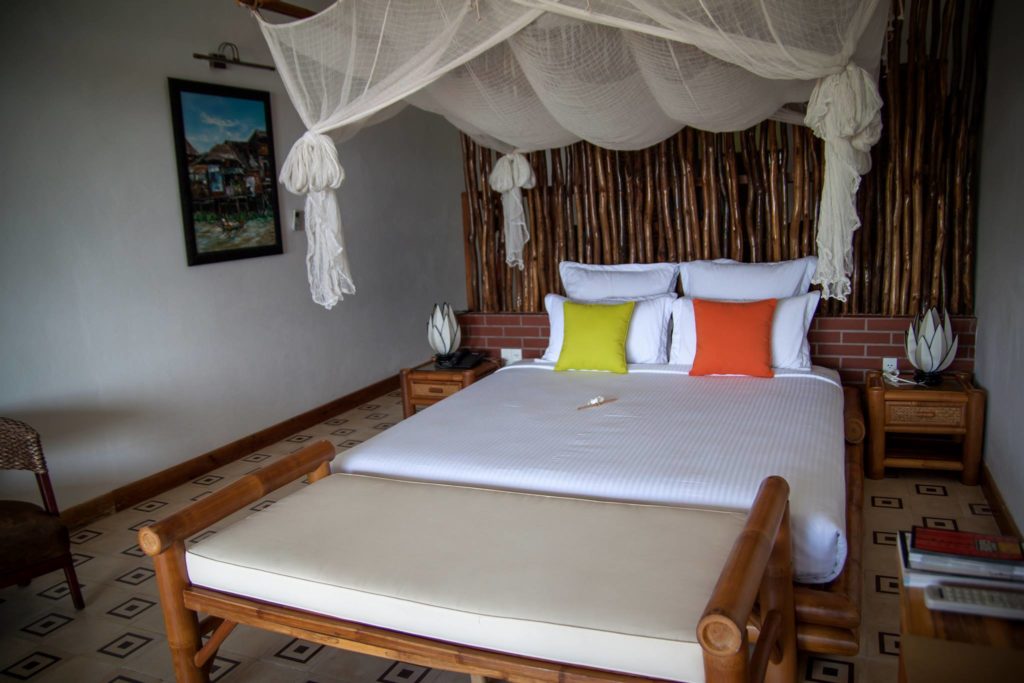
Sleep in a riad: Traditional Moroccan house built around a garden.

Barter: Everything is negotiable. In popular tourist markets, start negotiating at 1/3 of the quoted price. Agree on a taxi fare before you get in. Be aware of faux guides trying to offer to take you somewhere, as they’ll likely just take your money and lead you to a friend’s business.

Speak the language: Learn a few phrases and earn some respect:

  • Hello: as-salam ‘alaykum
  • Thank you: shukran
  • I don’t understand: la afham

Beware of pickpocketing: Do not walk alone at night and be careful to keep anything of value very close to you. Small children are just as likely to be pickpockets as anyone else. Be aware as well of a common trick in smaller towns where locals will try to befriend you over a day or so before stealing from you.

Eat from street stalls: Street stalls are everywhere and offer the best food for little price.

Back to Top

Two Weeks In New Zealand’s South Island; Travel Itinerary

New Zealand is an amazing place to backpack, and is renowned for its adventure sports and, of course, its landscape.  While the North Island has plenty to offer with its volcanoes, farms, large cities (Auckland) and Hobbit-themed attractions, South Island is where you’ll find much of the mountainous and picturesque scenery you expect from the country. Whether you’re coming to the South Island to road trip, relax, or partake in the many adrenaline-pumping adventures that South Island has to offer, you’re in for a trip you’ll never forget.

Queenstown, New Zealand Ferry

A ferry passes by Queenstown on South Island, New Zealand.


What to expect from this itinerary: You’ll pick up a campervan on arrival in Christchurch and spend two weeks travelling all around the South Island.  For the first half of the trip you’ll be camping and cooking some of your own meals, making you better able to save some money and stay right in the beautiful landscapes you’re craving. For the second half of the trip you’ll ditch the campervan and stay in hostels or huts while you explore local towns and mountainous passes.  A budget-friendly trip, expect to spend much of the trip in the cramped space of your campervan and relying on the amenities provided by the campsites you visit (most of which we picked have showers, bathrooms, and shared kitchens to use).  We will provide recommendations along the way, leaving the degree of adventure you want to take up to you! So read on below and get your vacation booked!

What You Need To Know

Money/Currency: 1 USD = 1.50 NZD. Credit cards are widely accepted and ATMs are available in most cities.

Accommodation: Hostels starting at 25 NZD for a shared dorm or 50 NZD for a private room.  Hotels for 100-150 NZD. Camping is very popular across the country for 10-15 NZD, but look first for free camping, which can get you some beautiful campsites (some of which even having drop-toilets) for no charge.

Food: Food is expensive in New Zealand.  Grab a flat-white coffee for 4 NZD in the morning while you plan your day. Find lunch for 10-15 NZD, dinner for 20-30 NZD and beer for 6 NZD.

Transportation: Rental cars (Ace, ApexJucy) and Campervans (Jucy from 90 NZD/night or Britz) are quite popular in the country, and transfercar let’s you get free rentals between two locations (essentially you’re relocating the cars for the company and only have to pay for insurance). Bus (“Coach”) companies like InterCityNaked Bus, or Atomic Shuttles can get you most places in the country.  Domestic flights are relatively cheap via Air New Zealand or Jetstar. Rail is expensive, but can get you around the Island safely (Rail New Zealand).

Two-Week South Island Travel Itinerary

Day 1: Christchurch

As you’ll likely be flying into Christchurch’s International Airport after a potentially long day of travel, spend a night here to regain some energy and take care of some necessities.  Start by picking up a rental car to help you through the first part of the trip. Since the beginning of the trip will be based on small towers, I’d recommend a modified sleeper van from Jucy (cheapest sleeper vans in the country) that comes with a fold-out double-bed and mini kitchenette.  This will make it easiest to take advantage of camping sites and just play your days by ear.  Stop off at the local supermarket to stock your campervan’s fridge with some necessities and get some ground coffee to cook in the mornings. As your drive through the streets, you’ll still notice evidence of the rebuilding underway to repair the city of the 2011 earthquake.

Days 2-3: Marlborough (Blenheim or Picton)

Travel up to the northeastern tip of South Island and explore wine country, sipping on local varieties of Sauvignon Blanc, Pinot Noir, and Chardonnay. You’ll find stunning views and plenty of wildlife around Marlborough Sounds and Abel Tasman on your stay.

  • Getting there: 4.5hr drive north of Christchurch (5.5hr if by bus). Ferries make daily trips between North and South Island, Rail runs stop in Blenheim, Kaikoura, Picton, and Seddon, domestic flights can land in Blenheim and Picton, buses run from Christchurch through Picton, and from Picton to Blenheim and Nelson. Nelson Lake Shuttles provide transport around the area.
  • Where to Stay: There are plenty of places you can stay, but save some money and free camp at one of the many sites that have toilets and are near town.
  • What to do: Rent a bike and go wine-tasting at one of the many vineyards. Scout for wildlife in the beautiful Marlborough Sounds. Road-trip up to Tasman Bay and explore Abel Tasman. Explore Sawcut Gorge. Try locally-farmed greenshell mussels. Go whale-watching in Kaikoura. Soak in the hot springs of Hanmer Springs.

Day 4-5: Greymouth

Begin your trek down the western coast of South Island and stop at Greymouth on the way to enjoy peaceful walks on the beach, and maybe a couple touristy sight-seeing spots as well.

  • Getting there:  4.5hr drive southwest Marlborough
  • Where to Stay: Camp at Greymouth Seaview Park and restock on groceries at the supermarket a short walk away.
  • What to Do: Drive the beautiful Coastal Road and make impulsive stops. Try to find Motukiekie Beach, a beautiful hidden beach that you will not find in any brochure and will yield beautiful views if you walk a distance during low-tide. See the blue waters at the Hokitika Gorge Walk if you’re up for an out-of-the-way drive for a 15-minute walk. Walk Cape Foulwind (1hr), and travel to Punakaiki and see Pancake Rocks at high-tide. Travel Arthur’s Pass, the highest pass in South Island and enjoy the scenic windy roads as you look for impulsive places to stop for a walk (Devils Punchbowl Waterfall or a walk through Castle Hill). Ask locals about hidden cave rafting.

Days 6-7: Aoraki Valley / Mount Cook

Explore Aoraki Valley National Park and see some of the most beautiful mountain views you’ll find this trip. Plan for a couple days as bad weather can hinder the ability to even be able to see anything at all.

  • Getting there:  6hr drive south of Greymouth, passing through Arthur’s Pass.
  • Where to Stay: Camp at Glentanner Park Centre right in the park for several days to ensure good visibility at one of the best views on the island and hike one of the many trails.
  • What to Do: Star gaze at the Mt. John Observatory ($100). Take advantage of one of the most scenic photo-ops you’ll get at Church of the Good Shepherd. Travel to Franz Josef Glacier (40min hike) to see a glacier in rapid retreat. Hike:
    • Hooker Valley Track (10km/2.5hr) is one of the most scenic hikes in South Island, but if it’s raining or cloudy, you’ll see nothing.
    • Mueller Hut Track (3mi) steep switch-back hike but views of beautiful glacial pools.

Day 8: Wanaka

Before the lively adventure town of Queenstown, make a stop at the peaceful and cute lakeside retreat of Wanaka to unwind for one last day.

  • Getting there:  2.5hr drive south of Mount Cook National Park.
  • Where to Stay: Save some money again and opt to free camp for the night.
  • What to Do: Kayak in the lake. Hike Rob Roy Glacier Track (3.5 hr loop) to see active glaciers.

Days 9-13: Queenstown

We saved the best for last: enjoy a few days in the adventure capital of New Zealand on near the southern tip of the South Island. The opportunities here are endless, from amazing multi-day hiking treks, to skydiving, exploring the fjords, or just relaxing on the beaches that line the town, Queenstown is a place you’ll fall in love with instantly. So ditch the campervan or rental car on arrival and stay a while!

Day 14: Dunedin

Begin your trip back north to Christchurch, stopping at Dunedin on the way back to enjoy the local architecture and hear some good music.

  • Getting there:  4hr drive southwest of Queenstown.
  • What to Do: The Explore the historical sights and Victorian architecture. Make a trip to Gore and hear Country Music and go trout fishing

Return Home: Christchurch

  • Getting there:  4.5hr drive north from Dunedin.
  • What to Do: Reflect on an amazing 2-week roadtrip through New Zealand’s South Island!

Tips

Get a free car: Utilize transfercar to get what is essentially a free rental car.  Simply visit their site, choose your location and planned destination and see what cars are available and for how long. The company simply needs the car transferred to a different location, so you can potentially book a car for 5-days and only pay a few bucks for insurance.

Camp for free: New Zealand has plenty of free camping sites all across the country to take advantage of, some of which are extremely scenic and have their own drop toilet.

WWOOF: Volunteer to work on a farm and enjoy free room and board.

Back to Top

10 Days in Andalucia, Travel Itinerary

Touring Andalucia (Andalusia), you’ll immediately notice the Moorish influence that is rich in this southern region of Spain. But wonderful architecture isn’t the only thing to see: there’s some of the most beautiful beaches in the world, romantic cities to wander, remote “white village” towns dotting the mountainside to kick-back in, and plenty of culture all along the way.

Court of the Lions; Alhambra, Granada, Spain

Court of the Lions; Alhambra, Granada, Spain

What to expect from this itinerary: We’ll bounce you around several of our favorite cities in Andalucia over the course of this trip, so expect a bit of traveling, but short enough trips that you can still enjoy each day in full.  We’ll try to keep the budget cheap, so you’ll stay in a mix of budget hostels as well as some nice accommodation thrown in here or there to keep you feeling fresh. Expect a little road trip, a little hiking, and plenty of history, walking, and wine!

The Basics

Money/Currency: 1 USD = 0.92 EUR

Where to stay: Hostels 15-30 EUR for dorms and 40 EUR for private.

Transportation: Fly via Madrid, Sevilla (Seville), or Malaga. Trains (RENFE) can get you all around the country quickly (though slightly price). Buses are common and car rentals are reasonably priced.

When to visit: Visit anytime April through June or September through October for the most reliable weather. July and August are unbearably hot in the cities, and also extremely crowded with foreign travelers.

Travel Itinerary

Day 1: Malaga

We’ll start the trip with a night in Malaga, one of the largest cities in southern Spain. Best known as the birthplace of Pablo Picasso, you’ll find art museums (surprise, surprise…), beaches, shopping, and delicious food.

  • Getting there: Fly directly into Malaga’s airport, or travel via train (2.5hr trip via high-speed RENFE) to the main transportation terminal (Maria Zambrano) and grab a cab (6-8 EUR) to your hostel. Busses are also available via Movelia or Alsa. Malaga is a transportation hub in the south, so getting there (or elsewhere) is very easy from Malaga.
  • Where to Stay: Hostel La Palma (from 20 EUR) for basic private rooms and shared bathrooms in a perfect location with balcony views. If you’re looking to be even more budget-friendly, check Oasis Backpackers Hostel (from 10 EUR) which is also in a great location with a rooftop balcony.
  • Where to Eat: Explore the one of them many chiringuitos along the beach (such as El Tintero, where there is no menu—waitresses announce what they’re carrying and you can claim any dish they carry) and have paella, fish, and sangria. Stop in the oldest tavern in Malaga, Antigua Casa de Guardia. On your stay, try espetos (sardines on a stick) or pescaito frito (deep-fried seafood).
  • What to Do: Visit the Moorish hill castle of Alcazaba (2 EUR / free Sunday afternoons) or Castillo de Gibralfaro (2 EUR / free Sunday afternoons) and enjoy the best view of the city. Embrace the city of Picasso and tour the Museo Picasso Malaga (8 EUR) to see some of his work or travel to his birthplace. Take advantage of your proximity to the coast and trek to some of Andalucia’s best beaches at Costa del Sol. Walk Calle Marqués de Larios after dark and take in the beauty of the pedestrian shopping street before ducking into one of the many alleyway restaurants for a glass of Mosto wine.

Day 2-4: Granada

Travel east to the beautiful and sprawling city of Granada. Explore the mesmerizing Alhambra overlooking the city, hike or ski in the nearby Sierra Nevada, wander the storied Albaicin district, or take advantage of a lively bar-scene driven by the local universities.  Like most places on this trip, the city is best seen by foot, so grab a local map and set-off exploring.

  • Getting there: Grab a bus from Malaga’s bus station (a 20 minute walk if you stayed at our previously recommended spots in town centre) and enjoy a scenic 2hr drive through the mountains. When you arrive, grab a 6-10 EUR cab ride to your hostel. You can also get here by flying into the small local airport, by trains (from Madrid, Cordoba, Barcelona, Valencia, and Linares-Baeza).
  • Where to StayEl Granado hostel.
  • What to Do: See the Moorish architecture of Alhambra (see our Tips section at the bottom of this page). Go for a sunset walk up Carrera del Darro, Cuesta del Chapiz, stop for one of the best views of the city at Mirador San Nicolas, and then wander back down through El Albaicin district (which is best to get out of before dark). Take a ride to the Sierra Nevada for a hike or horseback ride. Enjoy the Andalucia’s most famous performance art of Flamenco, which dates back over 3,000 years. Tour La Catedral de Granada or Capilla Real).

Day 5-6: Ronda

Retreat from the cities packed with tourists and head to Ronda, a beautiful town set atop a deep gorge north of Malaga and slightly off the beaten-track. Spend the days hiking in the nearby mountains, shopping in the winding streets, or just relaxing in the remote white villages in the mountains along the horizon of the city.

  • Getting there: Enjoy a little road-tripping and rent a car from your previous destination and drive here. If that’s not desirable, you can easily catch a bus several times a day from Malaga (9 EUR) or get there from regional trains from Madrid and Costa del Sol. The train station is a short walk to the bus station. Once in town, you can best get around by foot, and you’ll find plenty of shops, restaurants, and sight-seeing if you stay near the gorge’s bridge in town.
  • Where to Stay: Be adventurous and stay with locals in one of the remote white villages in the mountains a 20-minute ride from town. You won’t find many English speakers, but you’ll find a nice retreat from the bustle of cities and tourists, and can spend your days relaxing or hiking in the surrounding mountains.If staying in town, check Budget: Hotel RondaSol (20 EUR for a private room). Midrange: Hotel Enfrente Arte Ronda (80 EUR). Luxurious: Hotel Acinipo.
  • What to Do: Walk across the Puente Nuevo (New Bridge) and do the short 10-min hike down into El Tajo (the gorge) for your best view of the city from down below. Shop in the Calle Espinel (Calle la Bola), the main shopping area. Get a permit and hike La Garganta Verde. If you’ve got some time to kill, tour the slightly underwhelming Plaza de Toros, the oldest bull ring in Spain for 6 EUR. Wander the twisting streets of La Ciudad, the oldest district in Ronda. Drive a couple hours to the beautiful mountain top town of Zahara la Sierra and eat on the narrow streets with a breath-taking overlook of the valley.

Day 7-9: Sevilla (Seville)

Spend the last nights of your trip in the capital of Andalucia, and Spain’s 4th largest city.

  • Getting there: If you’re following our itinerary, you will get here by a rental car, and immediately drop off the car once you get to town. Otherwise you can get here by air (fly into Sevilla International Airport, about 20 minutes from town or La Parra Internation Airport for budget airlines), by bus (5-20 EUR depending on where you’re coming from in Andalucia), or by train (Sevilla Santa Justa Station). Once in town, transportation is easy by foot, train, bus, scooter, or bicycle (see the “Sevici” bike system, letting you rent a bicycle for cheap to get between two destinations).
  • Where to Stay: Coming soon!
  • What to Do: There’s plenty to do in Sevilla, so don’t expect to run out of options–consider getting the Sevilla Card, which grants you access to most museums and monuments in town and can be used across multiple days. Tour the Cathedral of Seville (8 EUR) and climb the La Giralda clock tower (9 EUR) for a beautiful view of the city from above. Explore the gardens and Moorish palace of the Real Alcazar (9 EUR).  Hear the Spanish art of Flamenco at one of the many storied establishments in town. Attend a bull-fight at one of the oldest bull rings in Spain (not for the squeamish as it’s a 3-hour act that concludes with the bloody killing of a bull). Walk to the sprawling pavilion of Plaza de Espana, built in 1929 and climb the Cerro de Carambolo. Eat endless amounts of delicious tapas and ice cream.

Day 10: Madrid

Spend your last day in the country’s capital before you travel home, and enjoy the lively city’s nightlife and cultural heritage.

  • Getting there: Train (RENFE into stations Chamartin or Atocha), bus (nearly a dozen international bus stations exist in the city), air (Adolfo Suarez Madrid-Barajas Airport). Once in town, you’ll find one of the best public transportation systems in the country. Busses and subways (Metro de Madrid) are tightly connected and work with the same ticket (1.50 EUR for 5-stations, 8 EUR for a day unlimited travel), shuttles (MadShuttle, EuropeShuttle), and taxis (many don’t speak English, so write down your destination).
  • Where to Stay: Coming soon!
  • What to Do: Visit the central plaza of Puerta del Sol or the Plaza Mayor square for shopping, restaurants, street performers, and more. Tour the Museum District and see the famous fine art museum of Museo del Prado (14 EUR) or the Reina Sofia National Museum and Art Center (8 EUR) for modern art. Catch a performance of Flamenco at Corral de la Moreria or Las Tablas or Opera at the Teatro Real or see the Spanish National Orchestra at the Auditoria Nacional. Catch some football and see Real Madrid play or watch a bullfight at Las Venas, the birthplace of bull-fighting. If the timing of your trip lines up, see La Transhumancia (a massive festival where shepherds march their livestock through the streets) or the Madrid Gay Pride parade in June/July. Shop in Sol-Salamanca or Chueca and Fuencarral districs or the markets of El Rastro or Cuesta de Moyano.

Tips

Getting around: The cities we brought you to are best explored by foot, but there are plenty of options for local transport in each city. Busses will typically shuttle you around for 1 EUR, and taxis are prevalent.

Visiting Alhambra: Book your tickets in advance (print them in town at the tourist shop for Alhambra). You can’t go wrong with either the morning or afternoon tour window. Get your tickets printed (the tourist shop in town has a kiosk to do this for you) and head to relatively secret Puerta de la Justicia entrance and you’ll save an hour on entrance lines alone.

Speak the language: Learn a few phrases and earn some respect:

  • Hello: hola!
  • Please: por favor
  • Thank you: gracias
  • Good morning / Good evening: buenos días / buenos noches
  • Where is…: donde esta…
  • I don’t understand: no comprendo

Puerto Viejo, Costa Rica: Travel Itinerary

The Basics

Accommodation: Hotel La Costa de Papito

  • From $79 USD/night, the Hotel La Costa de Papito offers individual wooden bungalows with canopy beds and large outdoor showers. The hotel is situated amongst an oasis of plants and trees, and is removed from any roadside noise. Conveniently located just minutes from the beach and a ten minute bike ride from town, it’s a great choice for those looking for a quiet, peaceful retreat.

Food: Take your pick from local Afro-Caribbean joints to comida tipica to more Western fare. Highlights include: chicken casada at Soda Isma , mojitos at Madre Tierra and fresh fruit juices from just about any roadside stall. Other recommendations include:

  • Soda Riquisimo– Hole in the wall spot with Carribbean fare. Averages $4-6/plate.
  • Lazlo’s fresh catch of the day- Family run restaurant serving excellent seafood. We recommend the fresh tuna steaks!

Transportation:

City Bus $10/person via Auto Transportes Mepe.
Terminal San Carlos (aka Atlantico Norte) Calle 12 between Avenidas 7 and 9 in Barrio Mexico in San Jose

  • Puerto Viejo to San Jose: $9.50; 7:30 a.m., 9:00 a.m., 11:00 a.m., 4:00 p.m.; 4.5 hours. Departs from main bus station, located across from Playa Chino. Auto Transportes MEPE, (506) 2750-0023.
  • San Jose to Puerto Viejo: $9.50; 6:00 a.m., 10:00 a.m., 12:00 p.m., 2:00 p.m. and 4:00 p.m.; 4.5 hours, daily. Departs Transportes Mepe in the San Carlos Terminal, located on Avenida 9 and Calle 12. Tel: (506) 2257-8129
  • Purchasing: Can only be bought at terminal & sometimes sell-out. Except the 6 a.m.departure, you can call the Transportes Mepe office in San José to reserve a ticket the day before or the day of but note they only speak Spanish. No credit card number or deposit is required but you must show up at the ticket office at least 30 minutes prior to departure.
  • Schedule/Info: http://www.puertoviejosatellite.com/bus-to-puerto-viejo.php
  • Interbus
    $49/person
    Greyhound and Interbus offer private, air-conditioned shuttles for hotel-to-hotel/airport transport. Tel. 4031-0888
    http://www.puertoviejosatellite.com/shuttle-to-puerto-viejo.php
  • San Jose to Puerto Viejo, $49; Departs 7:50 a.m.; 4.5 hours.

What to do: Relax! We didn’t plan much for this portion of our stay, and enjoyed relaxing on the beach, walking along the quiet streets of Puerto Viejo and biking around the surrounding towns. Besides beach bumming and hammock swinging, you can:

Tips

Food: Rice and beans are the staple bases of all Costa Rican meals (and on the Caribbean side, they’ll often be cooked in coconut milk), and beef is very common as well.  At breakfast ($5) you’ll get as gallo pinto, served with either eggs, seafood, or steak. In the afternoon ($7-15) you’ll have casado, with either chicken, seafood, or beef, and fried plantains and cabbage.  Appetizers (or bocas) are often served with drinks and are sometimes free.  Ticos love snacking, so you’ll find plenty of options in local cafes (sodas): look for tamales, gallos, empanades, patacones, and the like.  If you like seafood, try the Sea Bass (corvina – note: cheap restaurants are known to shark meat as sea bass), red snapper (pargo), tuna, or mahi mahi (dorado).

Transportation: There are many options for transportation around Costa Rica, but sticking to buses or shared vans are probably your best and cheapest option.  Vehicle rentals are extremely cheap, but make sure to get something with clearance and all-wheel drive, as many roads are in bad condition.  Be aware as well that you must buy liability insurance regardless of your coverage back home.  For domestic flights, check Sansa or Natureair.  If grabbing a taxi, make sure to get a red one, as these are the only legal taxis.

Back to Top

1 Week in Southern Vietnam; Travel Itinerary

Only have one week to explore Southern Vietnam? We got you covered. See our travel itinerary below, for Vietnam trip guides and advice so you can get the most out of limited time in Vietnam.

What to expect: Spend a few days in the bustling city of Ho Chi Minh City (Saigon), Vietnam with a retreat for a couple days to the Mekong Delta.

The Basics

Currency: 1 USD = 22,200 VND; 1 EUR = 24,100 VND

Requirements: Visa required on arrival.  You have two options:

  • Get a Visa from your country’s Vietnamese Embassy or Consulate office.  Expect this process to take 2-3 weeks (if by mail) or 2-3 days (if in person). You will be required to submit a permit form, two passport photos, your passport, and the Visa fee. While this process requires advanced planning, it will save you at least an hour getting through immigration in Vietnam.
  • Get a Visa on Arrival. Use a trusted site like http://www.myvietnamvisa.com/ to obtain a visa approval letter online (within 3-5 days) that you can bring on arrival in Vietnam to acquire the visa.  Opt for this method only if planning a last minute trip, as you will potentially have to wait in a very long visa line on arrival.

Transportation: Public bus travel is extremely affordable, though expect language barriers. Write-down where you’re going to show the driver. Metered taxis are available everywhere; Mai Linh and Vinasun are the most common and reliable.

Etiquette: Tipping is not common in Vietnam, though it may be expected by tour guides (50,000 – 100,000 VND depending on length of time spent). Restaurants will add a service charge in place of tipping.  Avoid insulting locals: do not leave chopsticks in the bowl at the end of your meal.

Days 1-2: Ho Chi Minh City

  • Why Ho Chi Minh City:
    • A better question to ask yourself is why not?  Ho Chi Minh City (HCMC)-formerly known as Saigon-is an energetic mix of old and new. The largest city in Vietnam, its metropolitan area is home to more than nine million people and almost as many motorbikes (at last count, the number was seven million). It can be overwhelming at first, but if you hang on long enough, you’re guaranteed to have a good time.
  • Getting there:
    • Planes, trains, buses and automobiles can take you directly into the city. HCMC’s Tan Son Nhat International Airport is located  4 miles (6 km) north of the center (District 1). You can also get to Vietnam overland from Laos, Cambodia or China. A great resource for overland travel to Vietnam can be found here.
  • Where to stay:
    • There are heaps of places to stay in HCMC that range from budget/ backpacker accommodations to luxurious 5-star hotels. We tried to mix it up and stay at the budget end our first couple nights, and splurged with fancy digs at the end of our trip. Some of our recommendations include:
  • Where to eat/drink:
    • As with many Southeast Asian big cities, the best food can be found on the street. We spent most of our time in District 1, and there’s no shortage of street vendors selling everything from classic banh mi sandwiches to sizzling hot bowls of pho. 
    • There are also a number of food options inside the Benh Thanh market, which serves up everything from fresh fruit smoothies to bo la lot, a seasoned beef wrapped inside a leaf.
  • What to do:
    • What to do: Go on a street food tour! A highlight of our time in HCMC was organizing a street food tour through Back of the Bike Tours. There are several companies that arrange food and city sight tours, but after some research, we concluded that Back of the Bike is one of the best. A bit about the experience: Be picked up at your hotel/guesthouse by young, local guides, strap on a helmet and get comfortable! Be prepared to cruise through the bustling streets of HCMC– legs tucked close to the motorbike–and make stops at delicious food stalls around the city. Sample cuisine from a variety of districts, try your hand at cooking alongside roadside chefs, and push yourself outside your culinary comfort zone. Food highlights on this tour include:Goi du du bo: julienned green papaya salad topped with Thai basil, dried beef liver, toasted peanuts and prawn crackers. Sauced with chili, light soy sauce and vinegar.

      Banh canh ghe: ocean crab soup with tapioca noodles, pork rinds, fried fish cake and green chili sauce.

      Banh xeo: crispy rice flour “crepe,” stuffed with shrimp, pork and bean sprouts. Served with fresh lettuce and sweet fish sauce.

    • Other things to note: bringing personal devices (including large cameras or cell phones) is strongly discouraged, as motorbike pickpocketing is fairly common. We had a hard time leaving our cameras behind, but the guides at Back of the Bike have a dedicated cameraman that travels along with each tour, and will snap photos throughout the evening! They sent us some fun shots afterwards of us sampling different food, and cruising around on the motorbikes. Heed their advice, and leave your camera back at your hotel. They’ll take care of all the photos!

14856071_10101187719911709_2954073124980235837_o13662033_10101187724487539_5890263414850746536_o

Days 2-4: Mekong Delta

  • Why the Mekong Delta region:
    • Because why not?! This area offers the perfect escape from the hustle and bustle of HCMC. If you’re interested in unwinding somewhere with river views, or bicycling around the rural countryside, a trip to the Mekong Delta is for you.
  • Getting there:
    • Since we only had a couple days to spare, we opted to visit Mỹ Tho, one of the more easily accessible towns in the Mekong region. Mỹ Tho is an important market town, and is considered to be the gateway to the Mekong Delta. While it doesn’t have quite the same reputation as towns like Can Tho or Cai Be (famous for their floating markets), we found it to be a perfectly relaxing way to spend a couple days outside the city.
  • Where to stay:
    • As this was the end of our trip, we decided to switch things up a bit. Instead of selecting a budget guesthouse, we opted to spend a bit more on some luxurious digs. How satisfied we were with this decision! The desire to “treat ourelves” led us to booking two nights at The Island Lodge, a boutique eco-lodge located just along the Mekong River.  The lodge is beautiful in every way. The open air concept throughout the lobby and dining area means that there isn’t a door or wall in sight to obstruct your view of the river and the lodge’s beautifully landscaped gardens.  The lodge oozes luxury in every sense,  so be prepared to relax!
  • What to do:
    • On day one, we rented bicycles from the hotel and explored the surrounding countyrside. This was definitely a highlight, as we were able to slowly cruise around and observe the local life around us. There wasn’t a whole lot going on on the back country roads, but this is precisely the kind of slow pace we were looking for! We did some photography in town, and biked our way home later that afternoon.
    • On day two, we booked a boat tour through the hotel. We had expected a boat full of people when we were picked up in the morning, but it ended up being just the two of us, a local guide and our boat captain. How intimate! We set off along the Mekong River, making a couple stops at various tourist attractions along the way.
      • Highlights: Our favorite part was hopping into a sampan and boating through a series of narrow canals. Note: a sampan  (meaning “three planks”) is a flat-bottomed wooden boat used for transportation through rivers or other costal areas. Sampan boats are typically propelled by oars or a pole (yuloh) and are common in rural areas of Southeast Asia, such as Vietnam, Malaysia, and Indonesia. This part of the tour was definitely the quintessential “Mekong River experience” we were looking for.
      • Lowlights: Getting dropped off at an “island” where we could sample “local delicacies” and then be passive aggresively asked to buy everything with which we were forced to sample. Tourist touts can be awkward, annoying or just plain uncomfortable. We felt guilty after politely declining (for the 10th time) to purchase “locally made” over-priced honey, and after a while, the solicitations left us deflated.

All in all, a visit to the Mekong Delta region is a rewarding experience, and worth the effort! If you can spare a couple days outside Ho Chi Minh City, do take the time to explore the area. Had we had a couple extra days, we would’ve loved to visit the floating markets of Can Tho, and perhaps arrange a homestay with a family in the area. All of that for the next trip to Vietnam!


14715438_10101187692167309_2935173524153115924_o 14753449_10101187691693259_4460779579913342955_o

Back to Top

One Week in Palawan; Travel Itinerary

Ranked as one of the best islands in the world, with crystal clear beaches, world-class diving and coral reef snorkeling, countless islands to explore and some of the nicest people in Southeast Asia, Palawan is a place you’ll never forget and forever want to come back to. Even if you only have one week in Palawan, we’ve got you covered with a day-to-day travel itinerary, money savings tips, and a general guide to help you get the most out of 7-days in Palawan.

Port Barton Sunsets

Breath-taking sunsets as seen from Port Barton each night.


What to expect from this itinerary: This is for travelers looking for a balance between the “authentic” Filipino experience, and those wanting some comforts while on vacation. You’ll spend a few days in Port Barton, far removed from common tourist traps, spending each day island hopping, snorkeling, paddle-boarding, shopping alongside local villagers in town, and sipping cheap beers by a beautiful beach. From there you’ll hop a 30-minute boat ride to an isolated beach, spending a few days “luxury” camping with a small group of other adventurous travelers from around the world. You’ll fish, kayak, hike, play volleyball, and enjoy the most pristine private beach you’ll see in Palawan, all while enjoying mouth-watering home-cooked communal dinners and firepit story-telling.  You’ll end your trip with a journey north to the limestone cliff town of El Nido for world-class snorkeling and island hoping before catching a flight home. It’ll be a short trip, but it won’t be one you regret.

What You Need To Know

Currency: 1 USD = P48.

Plan Ahead: Don’t expect the same conveniences you might be used to when you travel. Electricity is limited and unpredictable, and you may only have electricity for a few hours a day. Charge your equipment when you can!

Bring Cash: Limited to no acceptance of credit cards and no ATMs–bring cash. Even though El Nido recently got an ATM (as of late 2015), it’s known for running out of cash.  Put simply: plan on paying for everything in cash.

Travel light: Everything you need should fit in a backpack under 10kg. This won’t just make travel easier, it’s a requirement to fly from El Nido to Manila.

Etiquette: Tipping is not common in the Philippines, but typically you round-up on the cost of a taxi. Dress conservatively in town: bikinis are fine on the beach, but wrap a sarong around you when you head to restaurants, shops, or through town.

Days 1 thru 2: Port Barton

Travel from Puerto Princesa to Port Barton, a small coastal town halfway between Puerto Princesa and El Nido.  A rough 30-minute off-road ride from any major road, Port Barton was once imagined as the new, smaller El Nido, but tourism never really came. As a result, you’ll find much of what El Nido has to offer at a much cheaper price and without the crowds of tourists. Expect to walk the streets with locals (and many stray dogs) and spend your days relaxing on a hammock or exploring near-by islands. You will be woken up every morning by roosters or dog fights, so don’t count on sleeping in.

  • Getting There: Arrange for a Recaro van (+63 909 351 3037 or +63 905 485 8597) to pick you up from Puerto Princesa’s Airport or your hotel at 9am for P900. It’ll be a 5hr air-conditioned ride in a 12-seater van with one bathroom stop along the way. Expect an additional hour at start while passengers are picked-up and bags are strapped to the roof. Roads will be windy and bumpy: if you get motion sickness, bring your medicine.
  • Where to stay: For P1200/night, stay in the bare-bones cottages of Elsa’s Cottage and Restaurant right along the beach. While the cottages aren’t much, they offer some of the most consistently delicious food in town. For a little more, stay at Sunset Colors, which is also along the beach, and enjoy their morning yoga routines in a tree fort (P200). You can go cheaper by looking a block in from the beach for local rooms or homestays.
  • Where to eat/drink: For consistently tasty food with remarkably slow service, check Elsa’s Cottage and Restaurant. If you’re looking for somewhere to grab a drink, try the tree-fort overlooking the beach at Ausan Beachfront Restaurant.
  • What to do: Charter a boat from a hotel for P700/per and spend a day snorkeling and island hoping, your captain will also cook you a delicious meal of fish, veggies, and rice mid-day.

Days 3 thru 5: San Vicente

Remove yourself from civilization and stay on a private beach near San Vicente with a small group of other adventurous travelers. Spend your days borrowing kayaks, boating to rural villages, hiking to waterfalls, fishing with other travelers, sharing stories over campfire and home-cooked meals each night, or just enjoying the clearest, most pristine waters on Palawan. This will be the most memorable and special part of your trip, and you will never want to leave.

  • Where to stay: Stay at Toby & Thelma’s Camping Adventure for P1600/person per day. No need to bring anything (except maybe snacks): they’ll set you up with a tent (a glorified tent at that, complete with a mattress), towels, complimentary on-site water gear, and three delicious home-cooked meals a day at a communal table.
  • Where to eat/drink: You have no choice, but you’d also have it no other way: you have to eat there. Expect three delicious home-cooked meals each day at a communal table.  Breakfast and lunch are small, so bring snacks if needed, but be prepared for a massive buffet dinner each night. For post-dinner, there’s a house bar powered by a generator and a firepit to trade stories around each night.
  • What to do: Kayak to a nearby village and hike to a waterfall, go fishing with Toby and island locals, swim to one of many nearby islands, play volleyball as the sun sets over the water each night, shower at the natural spring, or just relax on the beach. You will find no more peaceful of a stay than your time here.

Day 6 thru 7: El Nido

Ignore the hype and only spend a couple days in “top travel destination” of El Nido. Sitting on the northern coast of Palawan around massive limestone cliffs, you’ll find beautiful island hoping, the island’s best snorkeling, plenty of restaurants and bars, but also loads of tourists. If diving is what you’re looking for, hop a 5hr ferry ride to the quieter island of Coron instead, and fly back to Manila from there. El Nido is not worth missing, but it’s also not worth overstaying your visit.

  • Getting There: Notify your hosts at Toby & Thelma’s and they’ll get you on a 10am boat and 4hr air-conditioned van ride to El Nido. From the bus terminal in El Nido, hop a P100 ride into town.
  • Where to stay: Directly in the middle of town, and still quiet, crash at Shipwrecked Pension House for P3000/night and enjoy your first air-conditioning and reliable power (generator) of the trip. Request a 2nd floor room, just don’t expect hot water or water pressure!  For a much more affordable and also lively atmosphere, stay at HakunaMatata Hostel (P800 for private room).
  • Where to eat/drink:
    • Happiness Beach Bar: Excellent views for sunset, so expect crowds.
    • Sunset Republica: Beautiful sunset views from Corong Corong and delicious, though very small plates.
    • Habibi Restaurant & Shisha Cafe: Chill 2nd floor bar along the beach and a perfect place to relax end of night.
    • Atmosphere: A sushi restaurant that does not serve sushi. Get their house noodle bowl.
    • L’assiette: Get to the 3rd floor view amazing views of the harbor. Just be aware you’re going to be spending more for your meal as a result.
  • What to do:
    • Island Hopping via Tour C for snorkeling and private beaches. If you’re traveling with a group, spend the extra P500/per and opt for a private tour to skip on the massive amount of tourists you will run into during the day. A private tour can help you avoid a packed boat and some of the most crowded islands. Looking to do a second tour? Try Tour A to see lagoons.
    • See the best sunset view in town at the hip bar Sunset Republica in nearby Corong Corong, a P100 tricycle ride away. Get there an hour before sunset if you want a good seat (or a seat at all) and expect it to be crowded. Great food but small portions.

Getting Home

Catch a P150 tricycle ride to El Nido’s airport and fly directly back to Manila on a 50-seater for P6750. Note that there’s a 10kg weight limitation on all baggage, and they will search your bags to remove any shells you’ve collected. Once you land at ITI’s terminal in Manila, ask an ITI employee for the 20-minute shuttle to the main terminal for P120. These flights do book-up, so either book in advance or from ArtCafe in town to reserve your seat.  To book in advance, contact ITI via email. You will be asked to send them payment via PayPal, but rest assured it’s trustworthy.

Anything we forget? Ideas of other places to check-out? Things not to miss? Leave it in the comments!

Tips

  • Tao Expeditions: Got some more time? Do a 3-5 day boat trip between El Nido and Coron, living on a boat and stopping at uninhabited and tourist-free islands all along the way. Fly home from Coron. $550 USD/per.
  • Room Availability: If you’re booking rooms in advance, take hotel warnings of “only 2 rooms left!” with a grain of salt. Many of these places only have a few rooms, so while it looks like the hotel is filling up fast, in reality there’s just as much availability today as the next day.

Back to Top